

Good timing matters as much as careful application. When deciding when to stain a timber deck, choose a dry, mild day, avoid direct sunlight and don’t stain if rain is expected within 24 hours.
It’s tempting to start as soon as the deck looks ready, but staining damp or sun-heated timber can make the job harder to manage. The surface needs to be clean and completely dry, so allow time for preparation as well as staining.
This guide explains how to clean the boards, judge whether they’re ready and choose suitable weather for staining. You’ll also learn how to apply stain along the grain, work across a few boards at a time and decide whether another coat is needed. A steady approach helps create a neat, even finish without rushing a job that’s best done in the right conditions.
Key Takeaways
- Move furniture and planters aside so you can reach the full deck surface and spot areas that need attention.
- Choose a deck cleaner and tools that suit the timber, then remove residue thoroughly before staining.
- Look over the boards for rough patches and worn finish, and prepare them evenly for a consistent result.
- Follow the stain’s application directions and work methodically to keep the finish neat across the deck.
Applying stain along the timber grain
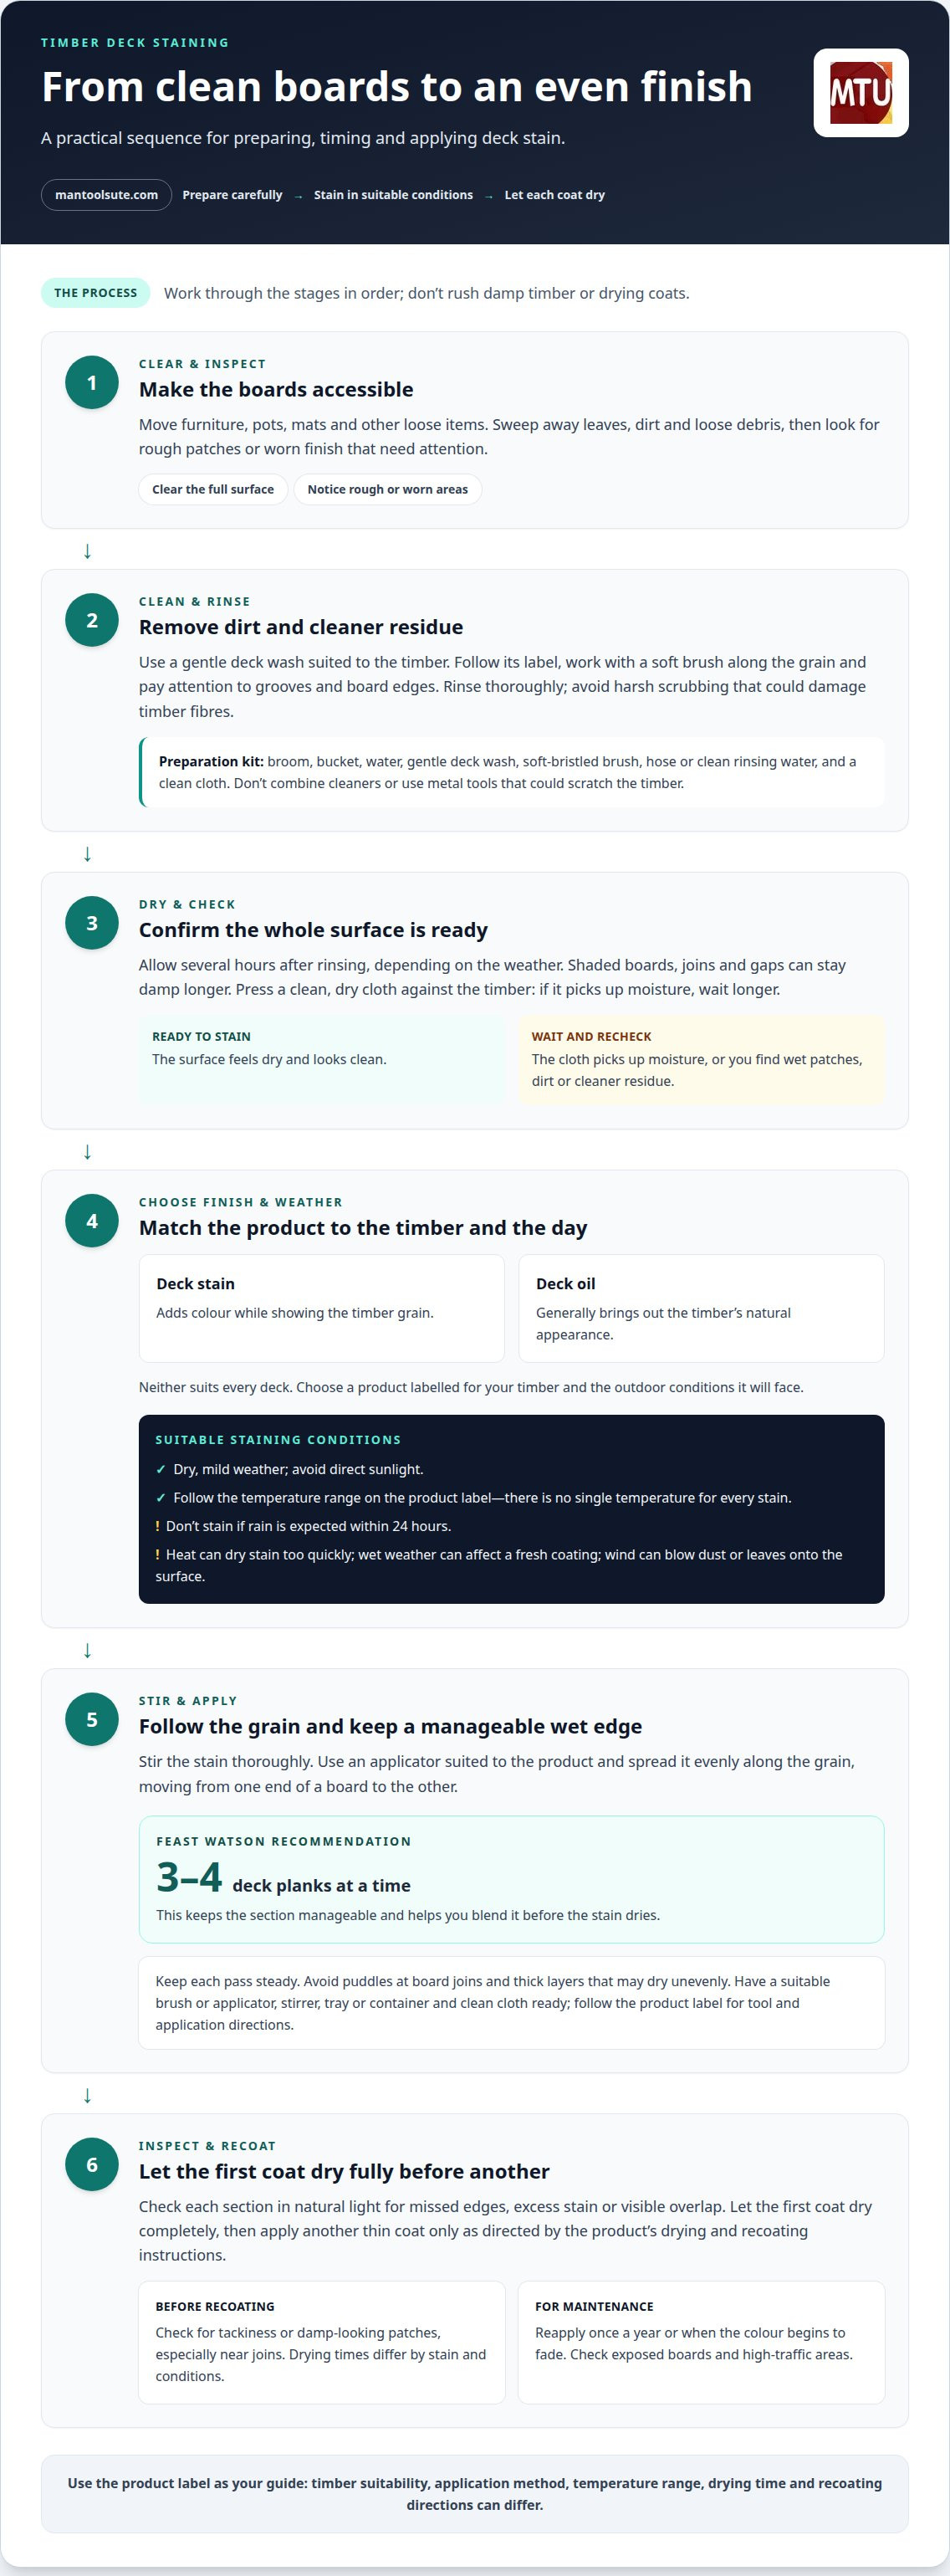
- Choose between deck stain and oil based on the finish you want and the timber’s condition. Stain adds colour while showing the grain; oil generally brings out the timber’s natural appearance. Neither suits every deck, so choose a product labelled for your timber and outdoor conditions.
- To decide when to stain a timber deck, choose a dry, mild day and avoid direct sunlight. There is no single temperature that suits every stain, so follow the temperature range on its label. Don’t stain if rain is expected within 24 hours. Hot conditions can dry stain too quickly, wet weather can affect a fresh coating, and wind may blow dust or leaves onto the surface.
- Stir the stain thoroughly, then work along the boards rather than across them. Feast Watson recommends applying Timber & Deck Stain along 3-4 deck planks at a time. This keeps a manageable wet edge and helps you blend each section before it dries. Use an applicator suited to the product and spread the stain evenly along the grain.
- Keep each pass steady, following the grain from one end of a board to the other. Avoid puddles around board joins or thick layers that may dry unevenly. Move methodically across the deck, checking each section in natural light for missed edges, excess stain or visible overlap before continuing.
- A useful guide for when to stain a timber deck is whether there’s enough suitable weather to complete the coats as directed. Let the first coat dry completely before applying another thin coat. Follow the product’s drying and recoating directions, as conditions and formulations differ. For maintenance, reapply stain once a year or when the colour begins to fade. Check exposed boards and high-traffic areas for fading.
Neither is universally better for Australian conditions: stain suits decks where you want added colour, while oil suits a more natural look. Choose a product labelled for your timber and the outdoor conditions it will face.
Cleaning and drying timber
Clean the boards before staining and let them dry fully. Use the deck’s condition and the stain label to guide your next steps.
-
Clean the timber
Brush leaves, dirt and loose debris off the boards, then wash the surface with a gentle deck wash. Follow the cleaner’s label and use a soft brush along the timber, paying attention to grooves and board edges where grime collects. Rinse thoroughly so cleaner and loosened dirt don’t remain beneath the stain.
Avoid harsh scrubbing that could damage the timber fibres. After rinsing, allow several hours for the deck to dry completely, depending on the weather. Shaded corners and gaps between boards can stay damp longer than exposed surfaces, so check them too.
-
Test whether the deck is ready
Once the boards have dried, check shaded areas and joins as well. Press a clean, dry cloth against the timber; if it picks up moisture or the surface still feels damp, wait longer. A dry-looking surface alone may not reveal water remaining in grooves or end grain.
Before staining, check the deck for wet patches, cleaner residue and dirt rinsed across the boards. If you find any, address them and let the affected area dry again. The practical test is simple: stain only when the whole surface feels dry and looks clean.
- Allow the first coat to dry fully before applying another. Drying time depends on the stain and conditions, so follow the product label rather than relying on a fixed wait. Check the boards for tackiness or damp-looking patches, especially near joins, before recoating. Applying a fresh layer too soon can interfere with an even finish.
- After rinsing during preparation, give the timber time to dry again before staining. Several hours may be needed, depending on the weather, and shaded boards can take longer. Don’t apply stain to damp wood to speed things up. Wait until the surface is dry, then follow the product’s recoat directions for any later coat.
Deck preparation products and tools
Set out the preparation products and staining tools before you start. Choose items suited to the deck’s surface and the stain’s instructions.
Gather deck preparation products
Start with a broom, bucket, water and a gentle deck wash. Check the cleaner’s label for timber suitability and directions, as products differ. Keep a soft-bristled brush handy to work wash into grooves and around board edges, where dirt can remain after sweeping.
- Read the deck wash instructions before mixing or applying it. Use only the amount and method stated on the label, and don’t combine cleaners. For stubborn grime, work in manageable sections so you can scrub and rinse each area thoroughly.
- Prepare a hose or clean water for rinsing, and use a broom to remove loose leaves and dirt first. Keep a clean cloth nearby to wipe a small area and inspect the boards. Avoid metal tools that could scratch the timber while clearing debris.
Gather staining tools and materials
Choose a brush or applicator designed for your stain, and keep a stirrer and suitable tray or container close by. Check the product label for application directions and compatible tools. A smaller brush can help reach board ends and tight edges without spreading excess stain onto nearby surfaces.
- Set out the stain, applicator, stirrer and a clean cloth before opening the container. Use the cloth to wipe drips promptly, and keep the lid handy to protect the stain between applications. Don’t use a container or tool that could introduce dirt, water or leftover product.
- Arrange your equipment so you can move steadily from one deck section to the next. Keep the applicator within easy reach and place the stain on a stable surface away from the boards being coated. Follow the label for stirring and application rather than assuming every stain uses the same method.
Clearing and sanding the deck
Clear the surface before sanding, then prepare rough areas without damaging sound boards. A clean, even surface helps the stain reach the timber consistently.
- Move chairs, pots, mats and other loose items off the deck. Clear leaves and dirt from between boards, where debris can collect and obstruct your work. Check around the deck too, so you can move freely without catching tools on stored items.
- Inspect each board for loose fixings, splinters, raised edges and worn patches. Pay particular attention to entry points, steps and areas beneath planters, where marks or uneven wear can be easy to miss. Note damaged timber before sanding; sanding won’t repair a loose or unstable board.
- Sand rough or weathered areas with a suitable sander or sanding block, moving in the direction of the timber grain. Keep the tool moving rather than focusing on one spot, which can leave a dip or visibly uneven patch. Use a sanding block around corners and edges a larger tool can’t reach neatly.
- Work carefully around board gaps, joins and raised fasteners. Don’t force sandpaper into gaps, where it can catch or leave the edges uneven. If an existing coating remains sound, don’t remove it just to make every board look identical; follow the preparation directions for the stain you plan to use.
- Brush sanding dust from the boards and gaps, then inspect the surface again in good light. Leftover dust can mix with stain and spoil the finish. Check corners and board ends, where fine residue often settles, and clear it before applying any coating.
- For a deck with widespread roughness or difficult preparation, get help with deck preparation before staining. A properly prepared surface gives the coating a cleaner base and makes missed splinters or uneven patches easier to address before work begins.
Mantoolsute Painting Service: Interior House Painting
Mantoolsute Painting Service provides Timber & Decking for homeowners who would rather have their deck staining handled professionally. Turn to the team when preparation feels demanding, the boards need careful attention, or you want help achieving a tidy finish. The right timing still matters: the deck needs suitable weather and a clean, dry surface before staining begins. For a broader painting project, Mantoolsute Painting Service also offers Interior House Painting, Exterior House Painting and Concrete & Driveway Painting. Each job can be considered on its own, so you can focus on the work your home needs. Contact Mantoolsute Painting Service to discuss your timber deck.
Plan your deck’s next refresh
Deciding when to stain a timber deck is also a chance to plan how you want your outdoor space to feel and function. Consider how the deck connects with the rest of your home, then choose a finish that suits its surroundings. A little planning helps you make a considered choice rather than treating the job as a last-minute fix.
If you’d prefer professional help, Mantoolsute Painting Service provides Timber & Decking, as well as Interior House Painting and Exterior House Painting. You can discuss the deck in the context of other painting work around your home, without planning every surface at once.
Take the next step when it suits you. Contact Mantoolsute Painting Service to talk about your timber deck and the approach that fits your home. A thoughtful plan can make the project feel more manageable, and help you move ahead with confidence.
Frequently Asked Questions
When is the best season to stain a timber deck in Australia?
There’s no single best season across Australia; choose a dry, mild weather window instead. Conditions vary between regions and weeks, so check the local forecast and stain label before planning the job. Avoid direct sunlight and choose a period without expected rain. A sheltered deck may dry differently from one exposed to wind or shade, so assess the surface itself too.
How long should new timber decking weather before staining?
Wait until new decking is ready for the particular stain rather than relying on a fixed weathering period. Timber species, treatments and exposure affect how boards respond, and product instructions may set different preparation requirements. Check the stain label for guidance on new timber, then inspect the boards for moisture or residue. Staining too early can affect how the coating settles.
How dry must timber be before applying deck stain?
The timber should be completely dry before you apply stain. Check more than the board tops: shaded areas, joins and end grain can retain moisture after the surface appears dry. Press a clean, dry cloth against a few boards, including a sheltered spot. If it picks up moisture, wait longer. A dry surface helps the stain coat the timber evenly.
How do you prepare and clean a timber deck before staining?
Start by moving items such as outdoor mats and pot plants, which can hide dirt or leave damp marks. Sweep the deck, then use a gentle deck wash according to its label. Pay attention to board ends and areas beneath planters, where residue can collect. Rinse away cleaner and loosened dirt, then let the surface dry before checking for remaining grime or rough spots.
How many coats of deck stain should you apply, and how long between coats?
Follow the stain label for the recommended number of coats and recoat timing. Apply a second thin coat only after the first has dried completely. For full sun exposure, Feast Watson recommends 3 coats of Timber & Deck Stain. Don’t assume that recommendation applies to every product; the timber, exposure and product directions determine the suitable coating schedule for your deck.
How long does deck stain take to dry before rain or foot traffic?
Drying time varies with the product and conditions, so use the label’s guidance before allowing foot traffic. Keep people and furniture off the boards until the coating has dried as directed. Avoid starting if rain is expected within 24 hours, and allow the surface to dry before exposing it to use. Cool, damp or shaded conditions can affect drying, so assess the deck itself.


