

A freshly painted room needs a little more planning than a clear floor: allow at least 24 hours before sleeping in it. To prepare for interior painting, protect belongings, clean and repair plasterboard walls, and plan where children and pets will stay while work is under way.
It’s easy to focus on the new colour, but a tidy, well-prepared room makes painting easier to manage and helps protect the rest of your home. Planning around family routines can also prevent last-minute disruptions.
This guide covers practical preparation, from moving furniture and smoothing walls to organising supplies and handling leftover paint. You’ll also find ways to plan around children and pets, keeping the work area separate from everyday family life.
Key Takeaways
- Clean previously painted plasterboard, fill surface damage and smooth rough patches before applying fresh paint.
- Move furniture out of the work area where possible, and cover remaining items and fragile belongings carefully.
- Plan a separate, secure area for children and pets away from painting tools and the work zone.
- Keep painting tools organised and handle leftover paint thoughtfully, following the product label for storage or disposal.
Cleaning tools and disposing of leftover paint
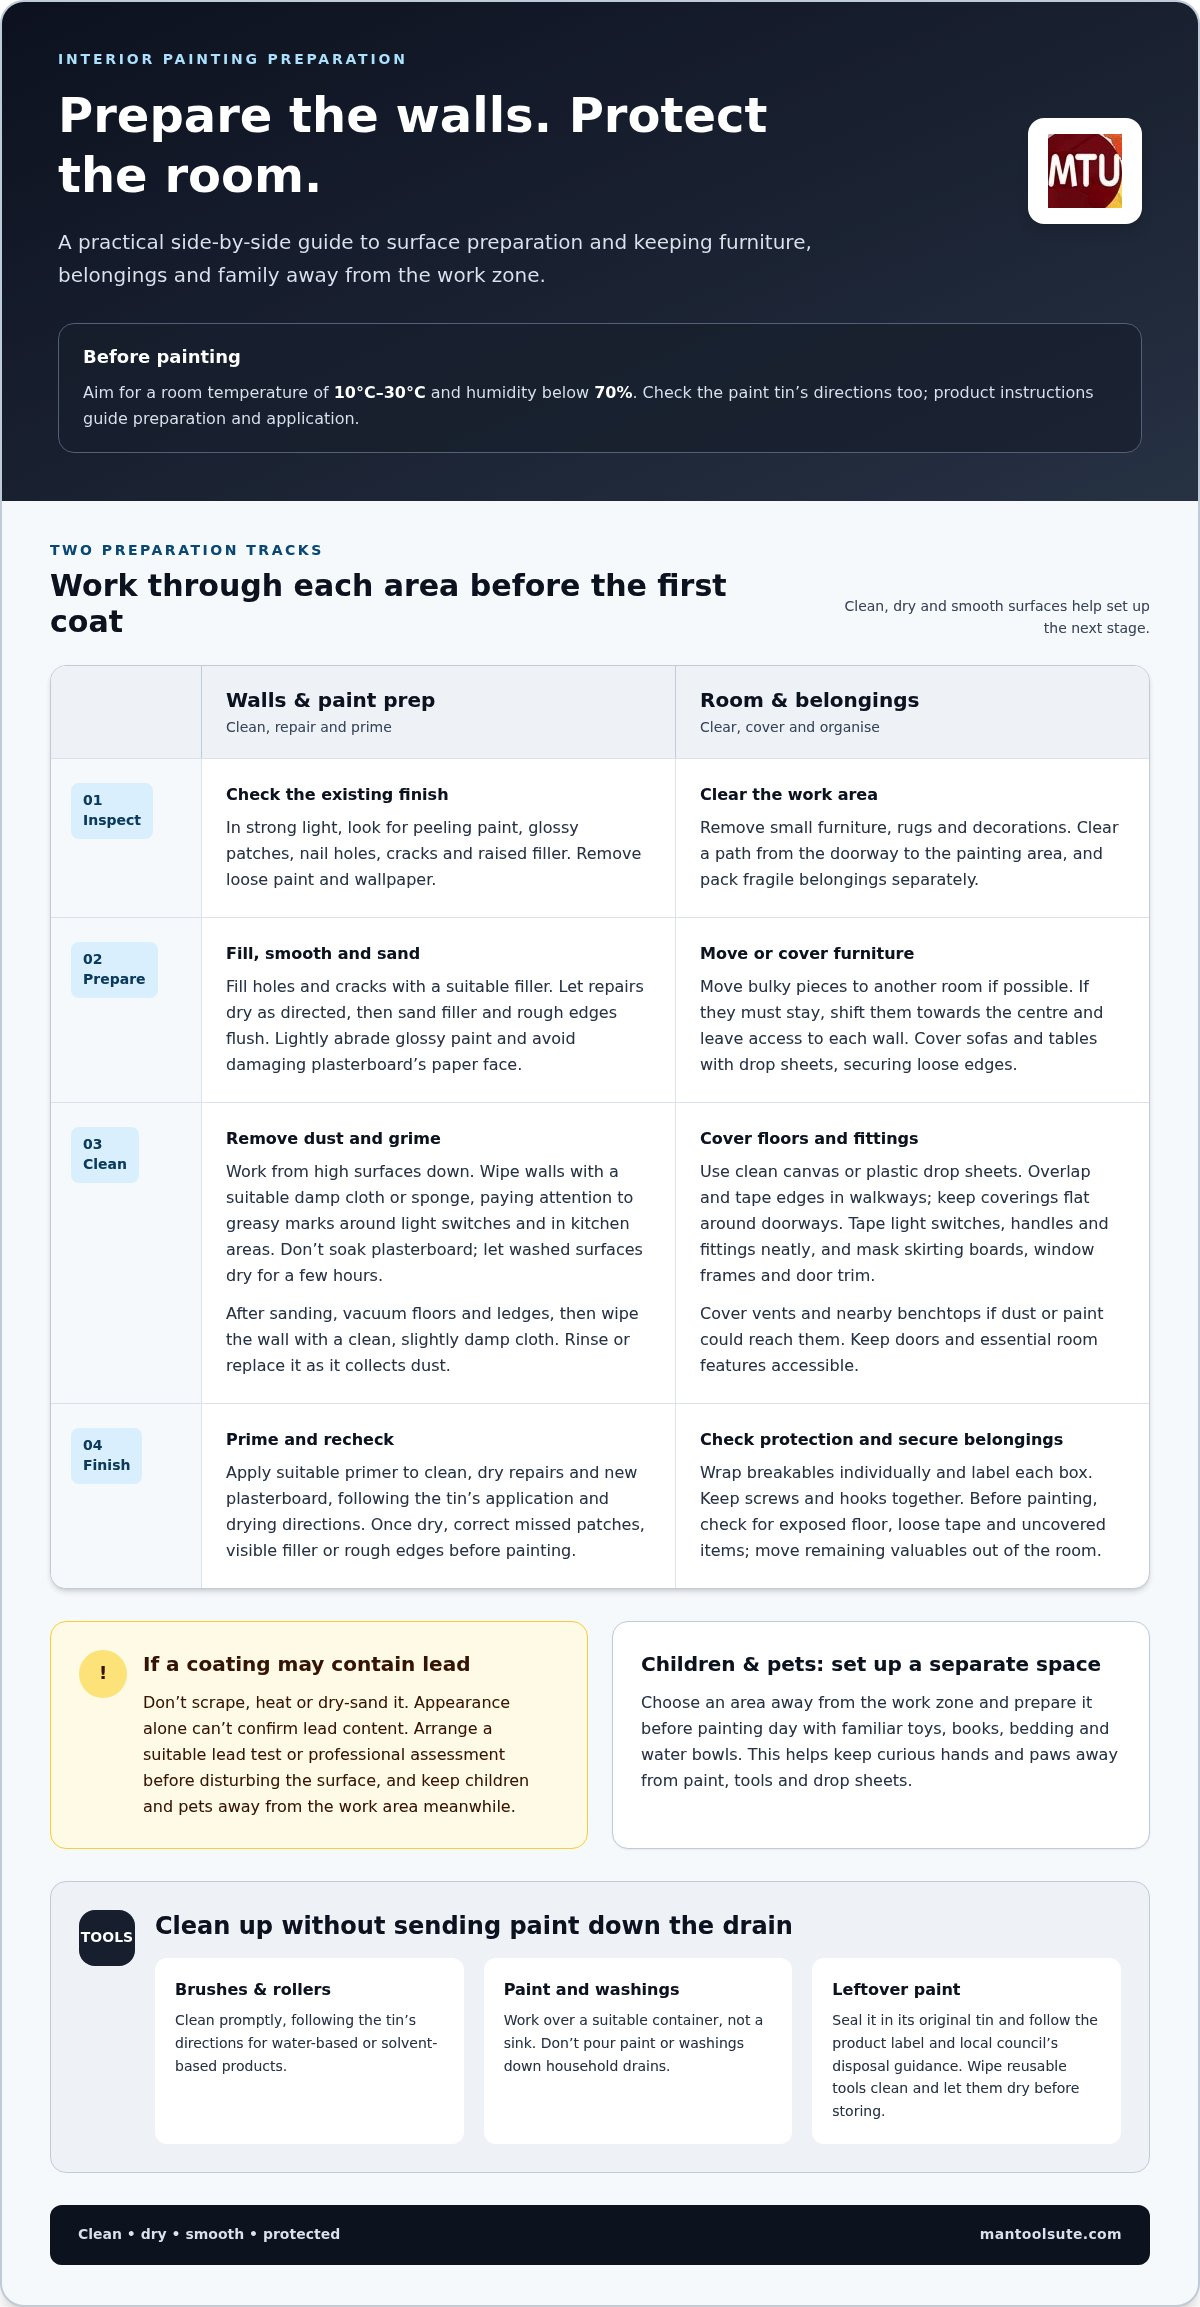
For interior painting in Australia, aim for a room temperature between 10°C and 30°C, with humidity below 70%. Check the paint tin’s directions too, as product instructions guide preparation and application.
- Clear the room before cleaning. Remove rubbish, dust shelves and skirting boards, and vacuum corners where cobwebs collect. Work from high surfaces down so loosened dust doesn’t settle on areas you’ve already cleaned.
- Clean walls with a suitable damp cloth or sponge, working from top to bottom. Pay particular attention to greasy marks around light switches and in kitchen areas. Avoid soaking plasterboard. After washing, let the surface dry for a few hours before applying primer or paint.
- After sanding, vacuum the floor and ledges to remove drywall dust, then wipe the wall with a clean, slightly damp cloth. Rinse or replace the cloth as it collects dust. Dust can interfere with paint adhesion, so check corners and trim before starting.
- If you suspect a coating may contain lead, don’t scrape, heat or dry-sand it. You can’t confirm lead content by appearance alone. Arrange a suitable lead test or professional assessment before disturbing the surface, and keep children and pets away from the work area in the meantime.
- Clean brushes and rollers promptly, following the paint tin’s instructions for water-based or solvent-based products. Work over a suitable container, not a sink, and don’t pour paint or washings down household drains. Seal leftover paint in its original tin, then follow the label and your local council’s disposal guidance. Wipe reusable tools clean and let them dry before storing.
Preparing previously painted plasterboard walls
If you’re working out how to prepare for interior painting, start by checking the existing finish on each wall. Match repairs and primer to the surface before applying the topcoat.
Fill and Sand Wall Surfaces
- Inspect previously painted plasterboard in strong light. Look for peeling paint, glossy patches, nail holes, cracks and raised filler. Remove loose paint and wallpaper, and repair woodwork where needed. The Australian Bureau of Statistics includes filling, smoothing and sealing surfaces among painting preparation tasks.
- Fill holes and cracks with a suitable filler. Smooth small ridges with a damp sponge before the filler sets to reduce later sanding. Let repairs dry as directed on the product label before sanding.
- Sand dried filler and rough edges until they sit flush with the surrounding wall. Use gentle pressure, especially near plasterboard joints, to avoid damaging the paper face. Lightly abrade glossy paint to reduce its sheen, then remove dust before priming.
- Prepare plaster and timber according to their condition. On plaster, address loose areas and uneven repairs. On timber, fill defects and smooth rough patches. The material and existing finish determine the preparation required.
- For new paperfaced plasterboard, check joints and fasteners for raised areas, then fill and smooth them. Sand carefully without scuffing the paper. An important part of how to prepare for interior painting is removing dust before applying primer suited to new plasterboard.
Prime the Walls
- Apply a suitable primer to clean, dry repairs and new plasterboard. Follow the tin’s directions for application and drying. Primer helps create an even base, particularly where bare material meets old paint.
- Inspect the primed wall once it’s dry. Correct missed patches, visible filler or rough edges before painting. For a dependable finish, treat how to prepare for interior painting as a sequence: each layer needs a clean, dry and smooth surface before the next step.
Moving and protecting furniture and fragile items
- Remove small furniture, rugs and decorations before covering the floor. Clear a path from the doorway to the painting area. This leaves room to move larger pieces without brushing against wet paint or knocking items from shelves.
- Move bulky furniture into another room if space allows. If it must stay, shift it towards the centre and leave access to each wall. Cover sofas and tables with drop sheets, securing loose edges so they don’t trail across the floor.
- Use clean canvas or plastic drop sheets to cover flooring. Overlap the edges and tape them down in walkways. Check that the covering lies flat around doorways, as folds can catch shoes or equipment during the work.
- Pack fragile belongings, including glassware, lamps and framed photographs, in a separate room. Wrap breakables individually and label each box with its contents. Remove wall décor carefully, then keep screws and hooks together in a small container.
- Protect light switches, door handles and fittings that won’t be removed. Apply painter’s tape neatly along their edges, pressing it down to prevent paint seeping underneath. Avoid taping over dusty or damp surfaces, where it may not stick smoothly.
- Mask skirting boards, window frames and door trim where they meet the wall. Apply tape in straight sections and press along the full edge with a clean finger. Check corners for gaps before painting, especially around detailed timber mouldings.
- Cover vents and nearby benchtops if dust or paint could reach them. Don’t block access to doors or essential room features. Keep the work area organised, with coverings secured and belongings clear of the route between the paint and supplies.
- Before painting, walk around the room and inspect each protected surface. Look for exposed floor, loose tape and uncovered items. Smooth lifted drop-sheet edges, then move remaining valuables out of the room rather than relying on a loose cover.
Preparing children and pets for painters
- Choose an area away from the work zone for children and pets. Set it up before painting day with familiar toys, books, bedding and water bowls. A separate space helps keep curious hands and paws away from paint, tools and drop sheets.
- Explain the plan to children in simple terms. Show them which rooms are closed and where they can play instead. For younger children, set a clear boundary, such as a closed door or safety gate, and keep paint tins and tools out of reach.
- Arrange for pets to stay with a trusted carer if your home doesn’t have a quiet, secure room. Otherwise, keep them behind a closed door, away from open windows, paint and equipment. Put a note on the door so nobody opens it by mistake.
- Before work begins, put away pet bowls, toys, leads and children’s belongings. Clear pathways between rooms so people can move without tripping over play equipment. Keep food, drink and personal items out of the painting area.
- Plan family routines around the room being painted. Move meals, naps and playtime to another part of the home, and explain that wet walls and tools are off limits. Keep children and pets out until the paint has dried and the room has been aired as directed on the product label.
- Check the paint label for handling and ventilation directions, then follow them throughout the work. Keep doors closed to separate the painting area while providing ventilation as instructed. If a child or pet needs to pass through, arrange a clear alternative route rather than carrying them past wet paint.
- For help planning the painting work around your household, talk with us about your painting project. A clear room-by-room plan can help you arrange family routines before work starts.
Mantoolsute Painting Service: Interior House Painting
Mantoolsute Painting Service provides interior house painting for homeowners ready to refresh rooms or update their home’s finish. If walls need more than a simple repaint, discuss the surface condition, colour choices and room-by-room priorities before work begins. Good preparation helps clarify what needs attention and how to plan around painting.
Mantoolsute Painting Service also provides exterior house painting, timber and decking treatments, and concrete and driveway painting. For interior projects, the team can handle the painting while you organise belongings, family routines and access to each room. Contact Mantoolsute Painting Service to discuss your interior painting project.
Set your painting plans in motion
A fresh interior can be a chance to rethink how each room works for your household, not just how it looks. Knowing how to prepare for interior painting gives you a clear starting point: decide which room matters most, consider how your family uses it, and plan around everyday routines.
Before choosing a start date, note any surface repairs and decisions still to make. A short list of rooms, priorities and questions can help shape a useful conversation about the project. It also gives you time to consider how the work may affect access, furniture and family plans.
Mantoolsute Painting Service offers interior house painting, alongside exterior house painting and timber and decking work. If you’re ready to discuss your home’s interior, contact Mantoolsute Painting Service to talk through your project. A considered plan is a good first step towards making your home feel refreshed and ready for what comes next.
Frequently Asked Questions
Is it safe to sleep in a freshly painted room?
Wait at least 24 hours before sleeping in a freshly painted room. Keep the room ventilated during and after painting, and follow the paint tin’s directions for drying and ventilation. If the room still smells strongly or feels damp, give it more time before using it overnight, especially for children or anyone sensitive to odours.
How long should I wait to hang pictures back on the walls after painting?
Wait at least 48 hours before rehanging pictures or wall décor. In humid conditions, allow up to 72 hours. Paint can feel dry before it has hardened enough to handle frames, hooks or adhesive strips. When rehanging, lift frames into place rather than sliding them across the wall, and avoid pressing hard against the fresh finish.
What’s the best interior painting schedule?
Plan the work in room order, starting with spaces that are easiest to clear or least used. In each room, work from the top down: ceiling first, then walls, followed by trim. Allow for surface repairs, drying and product directions between stages. Keep one room available for daily use, and schedule bedrooms around their overnight needs.
What tools and materials are needed to prepare a room for interior painting?
Gather a dusting cloth, vacuum, cleaning sponge, filler, filling knife, sanding block, primer, painter’s tape and drop sheets. Add a sturdy work light to reveal dents and uneven patches, plus a small container for screws removed from wall fittings. Keep the paint tin’s instructions nearby so you can match surface preparation and tool cleaning to the coating.
How should walls and ceilings be cleaned before painting?
Remove cobwebs and loose dust from ceilings first, using a clean duster or vacuum attachment. Wipe walls with a lightly damp sponge, paying attention to fingerprints near doorways and marks around switches. Avoid soaking plasterboard or letting water run onto skirting boards. Once clean, inspect the surface under bright light for grime or residue before proceeding.
How do you fill holes, cracks and dents before painting interior walls?
Choose a filler suited to the wall and the size of the defect. Press it into the hole or crack with a filling knife, scrape away excess and feather the edges. For a deeper dent, apply the filler in layers, letting each dry as directed. Sand the repair flush, then remove dust before priming or painting.


